Friday, June 21, 2013

Bagginsa Desert Raiders


 Reinforcements have arrived and now the desert will run red with the blood of the Big Folk!


 Elton Waters did a fine job converting Alternative Armies Halfling Mamaluke Chasseurs into mean lean desert raiders.


These little fellahs will serve as everything from Bebers, to Baggara, to Mamaluke irregulars and anything else I  need irregular dog archers for.


The Halflings ride Saluki hounds and tote short bows...very short bows.


There are two units of ten and each unit also has a unique leader, musician, and standard. The finial of one is the all important piece of cake, while the other features crossed pipes, thus representing two of the three pillars of  Shirelam, the third, of course. being strict adherence to Shire-eah law.


As a bouns, Mr. Waters included a 21st figure, a Halfling in Afri tribal garb. This chap, by Mr Water's reckoning is a shipwrecked sailor from the Windwards who has set himself up as a god among one of Afris many tribal factions.

As it happens I have need for just such a chap!  All will be revealed eventually.

For now here are a few more photos of the Halfling Irregulars.


Saturday, June 15, 2013

Operation Warboard: Churchills!

Last post ended with my infantry company bogged down, facing two Stug's across a narrow valley. 


 Fortunately the UPS truck arrived and brought reinforcements in the form of a troop of Churchills.

 Wasting no time they were sent right to the front.


Even as they arrived a platoon of German infantry appeared and assaulted the middle ridge. 1st platoon was able to hold on, just.


 With the threat of Jerry's infantry removed for the moment, the infantry tanks moved into position to dual with the Stugs.


Almost immediately one was immobilized. On the plus side the vehicle on my left was able to take out a machine gun nest that opened up on my advancing troops.


Pinning the enemy right with fire, I moved 2 and 3 platoon to cross the open ground and seize the far wood. That done the Stug's would be flanked ad forced to withdraw. That done, the Stug that was now also immobilized would fall into the bag.

No sooner had 2 platoon moved out then yet another platoon of German infantry and a sniper as well, opened fire!


Too late to alter plans now we pressed on! Another Stug was immobilized and the previously immobilized vehicle was knocked out!


My joy was short lived as a machine gun brought down the bulk of 3 platoon with one well placed burst. 


Even as 3 platoon was being mauled, 2 platoon took the wood line (with the help of a Churchill). 

All of a sudden a third German platoon assaulted my position on the middle ridge from my right flank!

1 platoon was sent packing back down the hill.

HQ platoon was forced to charge in order to blunt the attack.

The attack was beaten off but now before my rightmost Churchill had been knocked out.


That flank attack seemed to have been the German's last gasp. Now devoid of infantry support, the Stug's were doomed.

One of my chaps potted the immobilized vehicle with a well placed PIAT round.

The remaining Stug withdrew from the field.

With that my objective had been achieved although at some cost.

Total German forces encountered amounted to an infantry company with some support assets and weak platoon of Stug III's.

My force consisted of an infantry company and a troop of three Churchills.

German losses amounted to 26 infantry and 2 assault guns.

British loses were 18 infantry and 1 tank, with a second tank immobilized.

All in all Operation Warboard provided a fun game that was very easy to play. What more could one ask for?

Well obviously, in my case, an AI for my opponent...which various Two Hour Wargame mechanics handled quite well. Jerry would have done well to play less aggressively but then that is what the dice are for; to make sure that the enemy is not predictable. Certainly kept me on my toes!

British figures were from Airfix, with most of the Germans from Valient, although I did use Airfix Germans for the sniper and the PEF's. All of the AFV's were from Forces of Valor.

Hope you enjoyed the report and thanks for stopping by!

Thursday, June 13, 2013

Operation Warboard: 1944


I am a firm believer in never letting a terrain set up go to waste. It takes some time to set up a table even when using a random terrain generator and that takes away from gaming time.

With that in mind I try to use each layout for two or three games before cleaning up and starting again.

So here sunny Spain from 1810 has been transformed into NW Europe some time in 1944.

Having recently picked up the reissue of "Operation Warboard", my interest in gaming WWII land battles has been piqued again.

So with a couple of boxes of Airfix, and Valient, and some AFV's from forces of valor all is ready.

Now I must first apologize for the look of the thing. You see I do not paint my WWII infantry. For reasons of my own I prefer to think of them as toy army men rather than real folks.

That out of the way, the scenario is once again a scout. This time I have a company of British infantry.

I entered one platoon at start moving for the wooded hill center right. It turned out to house a Stug that did for my officer and PIAT man. 

Faced with being overrun by the rest of the platoon it drew back to the farther ridge line.


So I set up a fire base on the near hill while occupying the middle hill.

Meanwhile a German Panzerschreck team and another Stug (!) arrived from off board.

I'm calling a halt until my Churchill troop arrive. They are in the post and should be here tomorrow...

Hope you enjoyed this bit of silliness.

As an aside, "Operation Warboard" is a standard, two player, miniatures game. I am using solo mechanics from the original THW "Nuts!" rules modified by some of the techniques in Muskets and Shakos for the German AI.

Back in the day when Ed Teixieira first suggested his idea of treating tanks like wandering monsters in a fantasy RPG, I was non-plussed. Happily the mistake was mine. A fine mechanic for solo and co op gaming.

Monday, June 10, 2013

Muskets & Shakos: Scouting in Spain, 1810 The Action

Last time we looked at setting up a Scout encounter in Muskets & Shakos. To recap in this scenario the player(s) is presented with a table full of terrain but with no enemy forces deployed on it.

The objective is to get one of your officers to a point where they can view the center of each of the nine 1 foot by 1 foot squares that make up the battlefield. Those officers must then make it back to your start line to make their reports.

While no enemy is present on the table there are three Possible Enemy Forces or PEF's deployed at start. These PEF's can be moved by the game system and once you get a line of sight to them will either turn out to be enemy troops or nothing at all but a case of the jitters on your part.

For this encounter you start with only one brigade of your troops, in this case three infantry battalions. The rest of your division might arrive during the course of the game or might not according to the whim of fate.

As a reminder this game was limited to a 3x3 foot area delineated by the 2x4's and the yard stick. You may safely disregard anything outside of the those bounds.

Turn One
The first turn started with my moving all three battalions onto the table.  Each battalion put out a skirmish screen of three figures and followed in column. Two battalions went to the right of the hill in the center of my deployment zone. The other one went to the left.


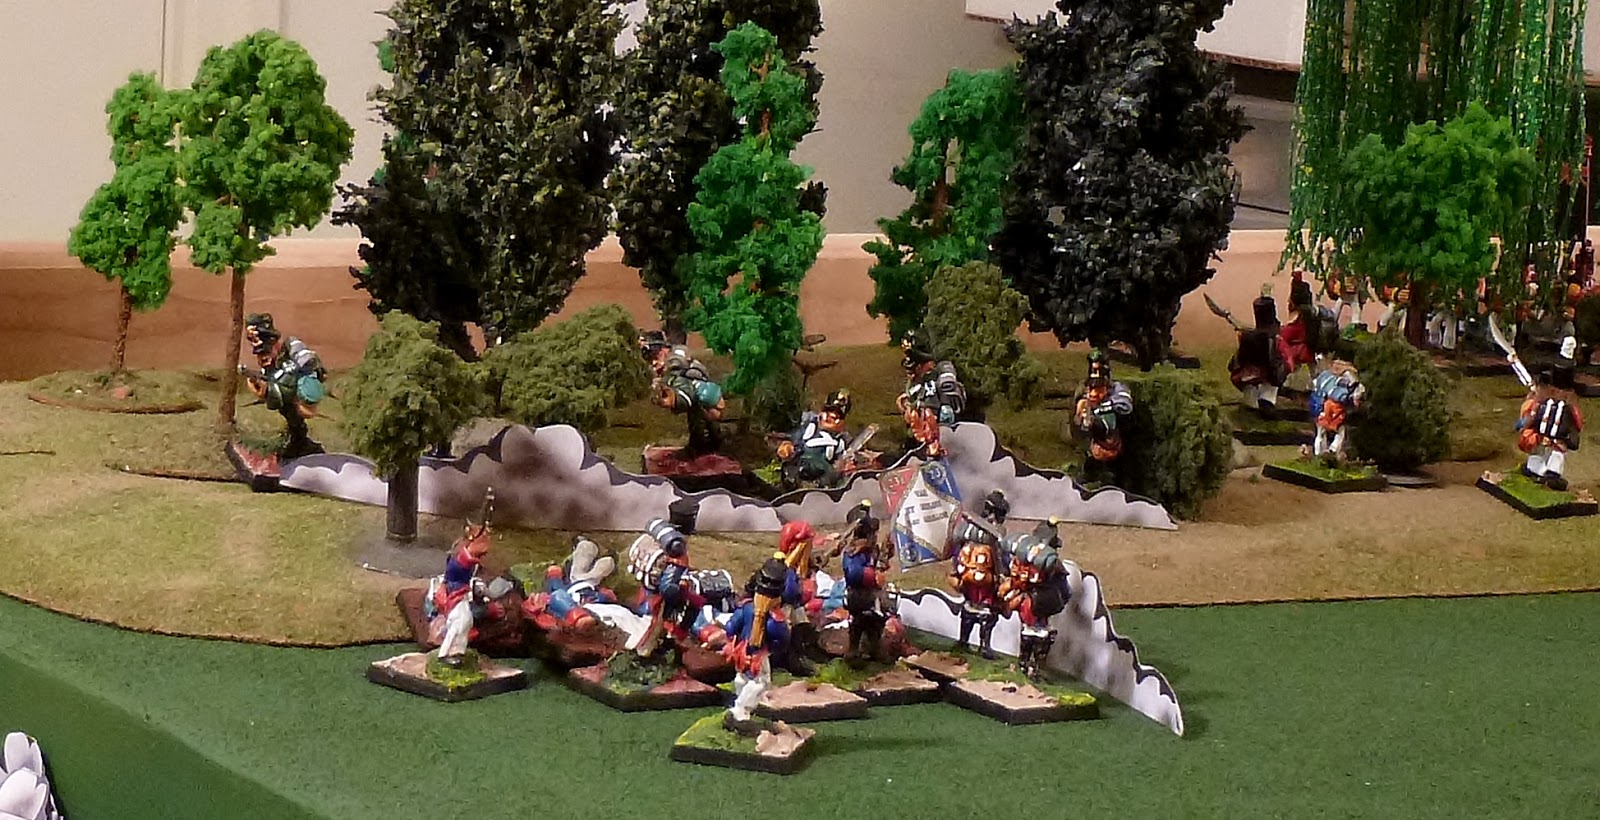
The skirmishers soon confirmed that a battalion of British infantry, the 62nd, was occupying the old growth woods atop the ridge distant center in the above photo. As these were old growth woods, the battalion was in line but in disorder due to the rugged nature of the terrain.


Naturally a firefight soon developed between my skirmishers and the battalion.

During the British turn one of the two PEF's behind the far ridge, split into two. Now there were still three Possible Enemy Forces in addition to the 62nd foot.

Turn Two

With the 62nd occupying the hill to my right front, I decided to form my right most battalion into line, while sending my second battalion to take the hill from the flank.


My third battalion continued to advance to the left of the center hill.


During the British turn, one of the remaining PEF's moved from behind the ridge, and came into sight. It turned out to be a section of guns behind works, supported by the 21st foot. The 21st had thrown out a strong screen of six skirmishing figures.


While it may seem strange that a moving PEF turned out to be an emplaced gun, keep in mind that Possible Enemy Forces are just that, "possible". They give only an impression of where you think the enemy might be. Only when revealed by your having sighted one can you tell what if anything it represented.

Apparently my skirmishers did not spot the emplacement immediately, only noticing it sometime after my turn had been completed.


Meanwhile the fighting around the 62nd intensified.


I had thought my left battalion safely behind the cover of the center hill, only to find that the British gunners could see them when a ball tore through the column.

Turn Three

It was at this point that I developed a cunning plan. While my first two battalions kept the 62nd busy, my third battalion would race across the open ground to the far ridge. Once there the ridge itself would shield them from the guns on my right.

This battalion would then see off the skirmishers from the 21st, and occupy the new growth woods atop the ridge. Being new growth the battalion would have to break down entirely into loose order, but I hoped that the officer would at least be able to complete the recce of the three ridge sections and then make a dash back to my start line.


The fighting for the middle ridge carried on and if you look closely at the photos you will see the first sign of men breaking from the ranks to make themselves scarce.


For game purposes these figures might as well just be removed from the table, and indeed there is no need for infantry casualty figures either. I just keep them on the table for the look of the thing.


My traffic management skills were found wanting, and my center and right battalions bunched. This both decreased the effectiveness of their fire, and left them vulnerable to counter attack although fortunately this latter did not materialize.

Turn Four

All was going according to plan. Well mostly. I decided to separate the center and right battalion to restore order so this delayed the center battalion's push on the 62nd's flank.


On the plus side the left battalion had advanced through shot and shell (really) and made it to the dead ground by the far ridge.


Both sides' skirmishers were plunking away at one another and as a result both screens thinned.


I avoded the temptaion to reinforce my skirmish line as that would have left me with fewer troops for the real fighting to follow.

Turn Five

Victory in sight!


The combined weight of my skirmish line and the left column, now turned to face along the ridge, saw off the last of the 21st's skirmishers. The center battalion was clear of the right battalion and all the pieces were falling into place.

When...


...the treeline on the far ridge erupted into a cloud of smoke as a detachment of the 95th Rifles fired point blank into the flank of my left battalion column!


The carnage was terrible yet somehow the troops kept their order.

Turn Six

All hope of victory had been dashed. It was now clear that even if the left battalion could fight off the 95th, it would be spent and unable to complete its mission. I decided to call it a day and conserve my forces for the inevitable British assault that would now follow as the next encounter.


Yet this was more easily said than done. The left battalion was essentially stranded under the guns of the enemy. I could face them away and march at best speed hoping that the following rifle and cannon shots would not destroy what remained. Or I could retire facing the enemy. This would be a very slow process and would subject them to even more rifle and cannon fire.

In the end I decided to face the Rifles and shoot it out. If the Rifles could be seen off then I would only have to worry about the guns during my retreat.


As it happened the very next volley of the Rifles killed the Colonel and brought the battalion down to five figures rendering it hors de combat. The remainder fled making best speed for the safety of our lines.


The other two battalions were able to retire unmolested. 


It was with some irony that I noted that with center battalion, the 55th, I had done an admirable impression of the Noble Duke of York, having "marched them up to the top of a hill and marched them down again". 


What price valor?

My loses were as follows:

2nd : 6 of 20
55th: 2 of 20
23rd: 20 of 20

The majority of these losses were of course stragglers rather than actual casualties.

I didn't count enemy losses but they were rather less than mine.

Where did I go wrong?

Well I lay no claim to tactical brilliance. Indeed it may be said that I went at them "in the same old way". Still I avoided the pitfall of charging troops that had not been weakened by fire, and if the dice had been kind and if the 95th had not appeared where and when it had...

"What if" is always the province of the defeated wargamer.

I probably should  have attached a battery to my brigade. Can't remember why I hadn't.  Probably was just in such a hurry to get on with it I simply forgot.

How was the game?

If I do say so myself it was a cracking game. As I wrote in the Set Up post this situation seemed all too familiar and indeed that was how it played itself out.

I take considerable satisfaction in that aspect of the thing. The dice really were unkind when it came to British forces and movements. I was unfortunate in that such strong British forces were generated and the chances of the them appearing where they could do the most damage was entirely down to luck.

Figures and terrain

As usual the figures are from Alternative Armies and were painted by their talented staff painters. 
The table top was made of Old Glory Terrain System tiles while the hills and most of the trees came from The Terrain Guy. The remainder of the trees are from Lemax, Warzone GTS, and model railroad trees of uncertain vintage.

Hope you enjoyed reading about the game as much as I enjoyed playing it!

Thanks for stopping by.

Friday, June 7, 2013

Muskets & Shakos: Scouting in Spain, 1810 Set Up

Having gotten the rules themselves sorted out, its time to turn to the Encounters the campaign game will generate. Actually I have a pretty good idea of what and how these encounters will work. What I need to focus on is force compositions and enemy generation.

Right now you will start a campaign with two infantry brigades of three battalions each, a cavalry brigade of two light cavalry regiments, a battery of horse guns, and a battery of field guns. 

Beyond that each force will be appointed corps assets from your non-player corps commander. The details of the sorts of assets you will receive will vary from nation to nation so that the French, for example are likely to get an additional battery of artillery while the British are likely to receive a few companies of light infantry instead. So far so good.

Now one thing those of you familiar with Two Hour Wargames will know, is that our games are designed to play on surfaces about 3 feet x 3 feet. One certainly can, as I almost always do, use a larger area, but we really want to provide games that can be played by those with limited space.

On to the set up: I am playing the French in 1810 in sunny Spain. For this battle I will be fighting against the British (which may include Portuguese troops, but I could just as easily ended up fighting the Spanish army and guerrillas.

I've gathered my forces and plan to send out my cavalry brigade to find out just where the enemy army is located.

To this end I sectioned off a three by three foot section  table.

Next I roll to see just what kind of terrain I will be fighting over. Normally there is an even chance of clear, wooded, or hilly, but this is the Peninsular War after all and the results are weighted away from clear.

The terrain roll tells me it will be hilly. I roll for each of the nine 1 foot square sectors to see what is in each.


I am presented with a rugged landscape. A hill immediately to my center front, a short ridge in middle table with some woods, and a long ridge with woods in the back. Rolling for the woods, I find that the middle distance wood is old growth and so will be passable to formed troops although causing them some disorder.
The far distance wood however is new growth, cluttered with undergrowth and impassable to horse, while infantry may only enter as skirmishers.

Think I will change my plan and lead with an infantry brigade.

Now I place the PEF's or Possible Enemy Forces. I actually designed the PEF system for my American Indian games and my PEF markers, are accordingly startled birds flying out from the bushes in best John Ford fashion.

Here they are on the table.

You may, as always, click on the photo to see an enlarged version of it, however to save you the trouble I'll just point them out to you.

One is in the center distance woods on my (coming from the orange yardstick) right, up on the short ridge. The second is behind that one, on the long ridge at the far side of the table. The third is in the woods on the other end of the long ridge.

That's it for the setup. I am facing a series of ridges with Possible Enemy Forces defending those ridges but I  cannot as yet see them.

Reminds me of any one of several factual and fictional accounts of the war in Spain before and must say "I don't have a good feeling about this"... : )

More as it happens.