Thursday, March 28, 2013

The 98 Day Eight: BGORA on the Go!

The imposing Fort Chuck
Events have unfolded rather rapidly since the Battle of Naughty Rhyme.

General Hochemont dispatched the Legion du Rospo Hippos to follow up the retreating General Mocambe N. Wise's forces as far as Illskinning. There the du Rospos found an as yet unidentified unit of light infantry holding the town. Col. Ranacavallo sent couriers asking for further instructions.

Meanwhile, General Hochemont left General de Brigade Fefalas in charge of 1st and 3rd brigade in his absence. On learning of the enemy force in Illskinning, General Fefalas lost no time in forming up his troops for an advance. He did this without orders from Hochemont, which is OK as that is what Hochemont was going to instruct him to do once the courier arrived.

Where was General Hochemont during this time? The General set out with the 1st Burrovian Cuirassiers to lead 2nd Bde  to reinforce General Moult's BGORA force. At the same time Hochemont wants to requisition some of the BGORA light cavalry for his forces. The Ferach paucity of light cavalry contributed significantly to the escape of Sir Morcambe N. Wise's force and  this is an event Hochemont wishes to avoid repeating.

General Hochemont also has an ulterior motive in taking the route he has chosen to confer with General Moult. Midway along the Naughty Rhyme-Ork road lies the wee town of Barney, site of Barney Castle, the cultural and spiritual center of Guinalea. It is rumored that Hochement intends to proclaim he is assuming the Purple once he reaches the site.

May 25th, Day 8


And what of General Moult and BGORA? 

They have made painfully slow progress down Guinalea's east coast, causing General Hochemont much despair.  Now that General Moult has reached the environs of Ork, his way is blocked by the earthwork Fort Chuck.


The fort is orced by Enri Simering's 62nd South Mordor Regiment, and a battery of RFA. They have even pressed the ancient Mons Tres, a cannon dating from the age of Magick, into service.


The 62nd is supported by the 26th Light Dragoons, a unit of Joccian Rats that have been keeping tabs on General Moult's forces all along their slow march southward.

The ever vigilant 26th Light Dragoons

Now, personally, I'm not one who enjoys "assault the fort" sort of games. I had hoped to use Moult's cavalry to outflank the fort by travelling south over the hills, to cut off the orc's retreat and harry their line of supplies while waiting for General Hochemont to come up with more troops.

However, apparently General Moult's Guinalean blood is up and he ordered an immediate frontal assault! Despite Agent d'Kless' protests, General Moult is even refusing to send word of his intentions to Hochemont until AFTER the assault is successful.

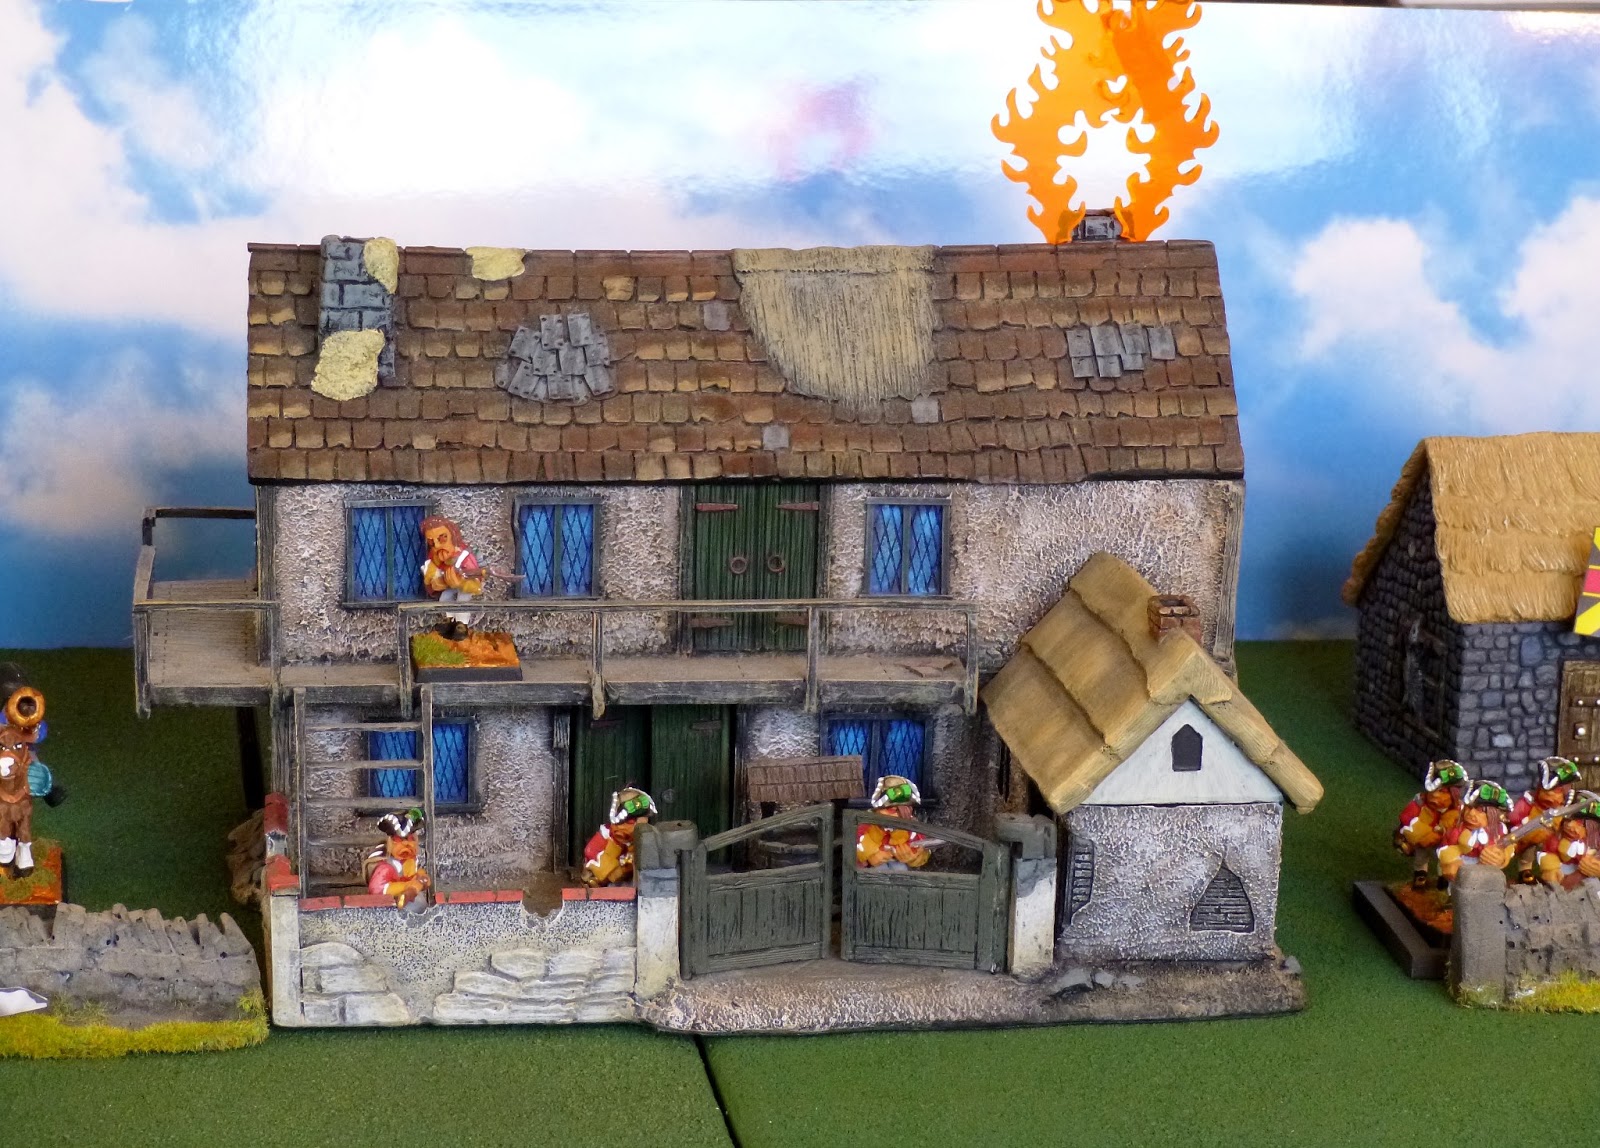
General Moult's forces will enter from the right of this photo
So the table is set and Moult is ready to begin a pre assault bombardment.

Allies. What can you do? It's never easy is it?

As usual the Napoleonic fantasy troops are from Alternative Armies and painted by their talented staff. I can not say enough good things about Alternative Armies and their painting service. Forty years in this hobby and I am finally able to put on the sorts of games I always wanted to.

The fort and ravelin are from Warlord Games.

The terrain tiles are from Old Glory

The sky backdrop is from Lemax.

Tune in again after the Easter truce to learn what happens next!

Happy Easter All!


Wednesday, March 27, 2013

Never Let a Coincidence Go to Waste!


The pub incident may prove useful to some of you who may find the idea of  running a narrative campaign* daunting.

Accidents will happen

By that I mean it can be difficult to try and come up with a story with which to link your games. So here is one way to go about it.

Just lay on your first game. Any pretext will do for that one. Boris the Slovenly covets Ragnar the Repugnant's Golden Stool for example.

Often, and this applies to solo, co-op and traditional gaming,you can forge a connection between events that happened during the game and run with them.

In the Battle of Naughty Rhyme there were two actually unconnected events that can be connected to give some back story to future games.

1. The Pub caught fire (random event).
2. The Wee Folk rolled over the 21st. without breaking a sweat. (luck of the dice).

Putting those two unrelated events together we now have a narrative: The Wee Folk, believing the pub fire to have been a deliberate act of orc barbarity, were berserk with rage and nothing could stand before them.

Now here is fodder for any number of future scenarios. If the rules being used cater for such one could say that the wee folk now "hate" the orcs, or that the orcs now "fear" the wee folk. Or to make it even for those so inclined the "hate" can be mutual.

In short, never let a coincidence go to waste when playing a narrative campaign!

* A "narrative campaign" is a series of games related to one another simply by a storyline as opposed to, for example, a "map campaign" where games result from movement on a strategic map. "The 98", from which the pub incident spawned, is actually a map campaign. In contrast the adventures of Giglamps are strung together only by the narrative of his actions. As followers of Giggers will already know, a narrative campaign can even weave map campaigns and one off games into the same thread.

Monday, March 25, 2013

The 98: High Noon at Naughty Rhyme

We left off after the first three turns of Battle of Naughty Rhyme
Turn four started with an event that has had repercussions down even to the present day.
With a thump the Pub caught fire! After the event the Artists and Poets Yeomanry steadfastly maintain the fire was the result of treachery. The Guinaleans maintain this was merely another act of Orc barbarism.  

I happen to know it was a random event from Charles Grant's book, but neither side is much interested in the truth it seems.

Needless to say the sight of the burning pub sent the Wee Folk into a frenzy (It really didn't but considering the events of the next few turns it seems like it did).


With a mighty howl, Wolfe Toon personally led the charge on the hated 21st. With a mighty squeal the Wee Folk of 3rd Guinalea followed.


The green tide was unstoppable.


In a matter of minutes, the 21st "Eyes N' Gourds" were in retreat. Not even the GOC, Sir Morcambe N. Wise could stop them.


Seeking to capitalize on this success Hochemont sent couriers to the Legion du Rospo on the left flank and the Burrovian heavies in reserve.

To his  right, the 2nd and 23rd rallied and resumed their advance.


Orders seen to, Hochemont galloped into the fray!


The 2nd and 23rd found the town now deserted. The Artists and Poets had fled.
(The Yeomanry fled because of the retreat of the 21st on their flank. However for the Guinaleans this was a sure sign of Yeomanry guilt in the pub fire.)


The courier reached Col. Ranacavallo on turn five only to find out the toad would not start moving until turn 7! Worse yet the courier sent to General Vanderhoof  commanding the cavalry reserve  received the same news. No cavalry support for two more turns.

There was now a real risk that the 12th Light Dragoons would counterattack the victorious Wee Folk with all that might entail.


Fortunately the Banshee Boyz emerged from the wood just in the nick of time.

Having to choose between coming to the aid of the 21st by charging into the town, or covering the now endangered battery as it withdrew, Col, Jones of the 12th chose the latter.


The Wee Folk finished chasing the orcs out of Naughty Rhyme and then began celebrating as only the Wee Folk can...

Final losses:

Ferach/Guinalean

General de Brigade Fefalas, 1st Brigade Wounded.
Colonel Orkean, 1st Guinalea Wounded.

2nd Ligne, 1st Brigade, 5 figures
1st Guinalea, 3rd Brigade, 7 figures

Greate Britorcn

Colonel Mon, 21st Foot, Wounded and Captured

21st Foot, 3 figures lost, 3 figures captured
Artists and Poets Yeomanry 5 figures lost, 5 figures captured

The Ferach also captures one gun abandoned in the pursuit.

So Naughty Rhyme has been liberated. Hochemont will spend the rest of the day recovering and reorganizing. 

With parity in light cavalry the pursuit will not be terribly dangerous for the retreating orcs and hobgoblins.

The Nerve Center : )
Just in case you were dying to see...I'll close with a shot of the Big Board. That's where it all happens really. It's all very antiquated with map pins and scribbles. It then gets recreated digitally for inclusion in the blog posts.

That's it for now. Will leave the strategic turn for later.


Sunday, March 24, 2013

The 98: Morning at Naughty Rhyme, Campaign Day 5

As noted here day four ended with General Hochemont concentrating his forces for an assault on the Britorcn position at Naughty Rhyme. That evening a rebel sympathizer came into the Ferach camp and revealed the enemy strength and dispositions.

General Hochemont suggested the rebels might assist his assault by firing one or more of the buildings the Artists and Poets Yeomanry were occupying. This the rebels refused to do. You see one building was the Church and the other the Pub!

The tale of the battle thus far is perhaps best told in captioned photos with a bit of text only here and there for continuity's sake.

Deployment:

Colonel Cyril Mon and the 21st Eyes N' Gourds in the center

Sir Morcambe N. Wise takes station between the 21st
 and the Artists and Poets Yeomanry

Baron D'Orcsy confers with with a chaplain while the Artists and Poets Yeomanry
take station on the Britorcn left.

The 21st Eyes N' Gourds

Orc artillery covers their right while the 12th "Prince of Taffsea's Own"
 Light Dragoons provide support

The Artists and Poets Yeomanry 

Legion du Rospo Hippos on my left. 
I posted the Legion du Rospo Hippos on my extreme left. In the unlikely event the enemy counter attacks, the Hippos will counter charge.

The Banshee Boyz
 The Banshee Boyz provided a welcome surprise. I had thought (and so weighted the dice) that the Boyz would be low quality troops. As it happened they turned out to be veterans!

First Guinalea  with Wolfe Toon on the left and General Hochemont on the right

Companie A Field Artillery and 23 Ligne

2nd Ligne and General de Brigade Fefalas
View from the orc left

View from the Ferach left
 First Turn

I opted to forego any pre-assault bombardment. Having only two batteries I decided to keep one in reserve and use the other to support the assault. Any pregame exchange of fire would have eroded my capability and, given the works the orcs had constructed, losses were likely to work out in their favor.

The Advance
 The opening salvo of Companie A Field Artillery felled Colonel Mann of the 21st! However with the Guinaleans so far away the 21st were able to rally with minimal fuss.

The orc artillery opened a withering fire on 1st Guinalea.

Turn Two

My second line entered to support the first. 

My intention is to have the wee folk of 2nd Guinalea pass through the first line to assault the 21st.

55th Ligne would support 2nd and/or 23rd as needed.

Getting to Grips

Received by Rolling Volleys

1st Guinalea suffers mounting casualties

Firefight
  2nd Ligne attempted to charge the Artists and Poets only to pull up short and exchange fire instead. An exchange that did not work out in their favor.

The 23rd advances


The wee folk of 2 Guinalea advance


First brigade engaged
 Turn Three 

Start of Turn Three

The fighting for pub and church took a shocking turn when a stray bullet felled General de Brigade Fefalas. Dismayed at his fall, the 2nd and 23rd retreated.

Retreat from Naughty Rhyme

Piling on the bad news, Colonel Orkean of 1st Gunalea also fell.
The plucky bog orcs of 1st Guinalea were able to carry on regardless of loss.

Wee folk, bog orc, and free!

As you can just barely see on the left of the above photo the Banshee Boyz  have just broken down into skirmish order and entered the wooded gully.

Coupled with the steady advance of the wee folk, I hope to break through the Orc line presently.

On my right 1st brigade has certainly suffered a bloody nose at the hands of the Artists and Poets Yeomanry. Didn't see that coming.

Oh well.  1st brigade should be able to rally.

Now should I commit the second brigade in support of the Guinaleans  or hold them back, whole, for future engagements?

That's all for now!

Stay tuned for the next installment

Same monkey time.

Same monkey channel.

Wednesday, March 20, 2013

The 98: Cavalry Skirmish before Naughty Rhyme

Although mentioned in previous posts, its time to give the cavalry skirmish that preceded the Battle of Naughty Rhyme a post of its own.

As you may recall, General Hochemont's division was under constant observation of a squadron or two of the 12th "Prince of Taffsea's Own" Light Dragoons (Hobgoblin) or 12LD for short.

Colonel Jone's 12th Light Dragoons (Hobgoblin)
 No doubt tired of always falling back before the foe, as the 12th neared the Orc defensive position at Naughty Rhyme, the observing squadrons, reinforced by the rest of the regiment turned to face Hochemont's advanced guard.

Colonel Ranacavallo leads the Legion Du Rospo Hippos
Being such a small fight, this  is a good opportunity to look at some of the ways  the Muskets system has evolved to handle a larger scale of battle. In Muskets & Mohawks for example, a regiment of cavalry would weight in at some 80-100 figures. Here, in Musket & Shakos, that same regiment is about 10 figures.

In this game, the 12th Light Dragoons field their full 10 figures deployed in two groups of 5 representing a forward line of two troops and a rear line of the same.

The Legion du Rospo Hippos, or LdR, had previously detached second squadron to accompany Toad Force on its scout and so was only able to muster 8 figures for this skirmish. I (as Ranacavallo) deployed my toads in one group of 5 followed by a reserve of 3.

All figures are Rep 4 in this game. While in a historical game of Muskets & Shakos, all light cavalry would have the same capabilities, as this is a fantasy game I've altered the movement rates. The 12th Light Dragoons on their rams have a move of 12", while the du Rospo hippos have a move a 9".

The game started as shown below. For our purposes just pretend the infantry and town in the background are further than they appear. If the skirmish really had taken place this close to the town, chances are it would have been uninterrupted by cannon fire and I really wanted this game to take place as a pure cavalry fight.

Starting positions
In this game I will be taking command of the Legion du Rospp Hippos and the game system will control the 12th Light Dragoons (Hobgoblin). I won the initiative roll and so go the first move.

Facing the faster rams of the 12th put me in a dangerous situation. There is an advantage to initiating a charge, as opposed to merely counter charging and the 12th's potential reach (24") was a lot farther than mine (18"). I decided to play cautiously and forge any fast move. When fast moving there is a chance you will lose a figure as straggler, and I was already outnumbered. Both lines advanced a normal (9") move. 

End First Toad Move
Now our forward squadrons ere only  about 16" apart. It was more than a ram's normal move but if Jones didn't attempt a fast move and charge me, there was a very good chance that I would fast move and charge him next turn.

Jones ordered the charge! Then he flubbed his fast move test. The forward squadrons moved forward 12" and lost one figure as a straggler.

Next the 12th LD's second line of squadrons normal moved so they would be close enough to counter attack the inevitable toad charge on turn two.


End of Turn One
 Turn two started with a charge by my forward squadrons. The charge procedure in Muskets & Shakos is similar to the melee procedure in the other Muskets games. This evolution saves times and gives fast results, and provides results more in line with the historical record as an added benefit.

Both sides rolled Rep x dice modified by the situation and as it happened the forward squadrons of the 12th LD routed from the field!

My toads had to test to avoid a messy pursuit what with the fresh squadrons of hobgoblins not far off. They succeeded and reigned in in good order about where the enemy line had started the turn.

I move my remaining squadron a normal move to cover the advance of the first two.

End of toad turn two. Rout of 3/12 LD and 4/12 LD
Col. Hatchet Jones was quick to seize his chance and led 1/ 12 LD and 2/12 LD straight at my victorious squadrons.

1/LdR and 3/LdR were forced to fall back with loss.

However the 12th LD squadrons fared ill on their pursuit tests and became spread out, losing formation. This is why it is always a good idea to keep some sabres in hand!

End of turn two. Leading LdR squadrons forced back with loss
 As it so happened I did have just one more squadron in hand and sent 4/LdR to counter attack.

The disorganized hobgoblins didn't rout but they were themselves forced back with loss.

Meanwhile attempts to rally first and second squadrons proved fruitless.

Turn three, toad move. 12th LD falls back with loss
 At this point Jones' only options were to attempt to rally his remaining troops or quit the field.

The Colonel made a valiant rally attempt but just could not restore his troops to order.

End of turn three. 12th LD unable to reform
With the onset of turn four, 4th/LdR followed up the retreating dragoons. To their immense credit the dragoons still refused to rout, giving up more ground and losing the odd hobgoblin and ram.

On the plus side Ranacavallo finally manged to rally and reform 1 and 2 LdR.

At this point the 12th Light Dragoons had been chased back to under the guns covering the town and I had Ranacavallo cease pursuit and rejoin the main body.


End of turn four and the game

So there it was. A sharp little action in which the Emperor's cavalry came out on top. Thought I was in for a kicking. Quite pleased with the result as you may well imagine.

Final losses were 7 out of 10 Light Dragoons and 1 out of 8 Legion du Rospo.

In post battle recovery the Light Dragoons recovered all but two figures while the toads got their sole loss returned.

As with most skirmishes the overall effect of this one is minor. I will now enter the main battle having achieved parity in light cavalry with Sir Morcambe N. Wise. In an assault on a fortified town I expect this success won't bear fruit until after the battle is resolved one way or the other!

It is worth pointing out that in this game the majority of losses come in the form of stragglers and deserters rather than physical casualties. As such the recovery rates are probably somewhat higher than most experienced war gamers are used to seeing.

Hope you enjoyed the game and thanks for stopping by!